

MLB The Show 26: Complete Guide to Legends and Special Card Series

As MLB The Show 26 approaches release, anticipation continues to grow—especially around Diamond Dynasty. Each year, this mode draws players in with its massive collection of legendary players and unique card series, allowing fans to create dream lineups that blend baseball icons with today’s superstars.

With early reveals already generating buzz, here’s a full breakdown of the legends and special card types you can expect this year.

Diamond Dynasty Expands Its Legendary Roster

Diamond Dynasty remains the core experience for many players, offering a card-collecting system where you build and upgrade your team through packs, programs, and rewards.

In MLB The Show 26, the legend roster is bigger than ever. Early reports suggest over 200 legendary players will be included, mixing returning fan favorites with a few fresh additions.

Some confirmed names include:

Ken Griffey Jr.
Chipper Jones
Roy Halladay
Joe Morgan
Adrián Beltré
Jim Thome

These players will appear across multiple card types, each representing different highlights or peak seasons from their careers.

2nd Half Heroes Series

One of the early featured sets is the 2nd Half Heroes collection, which focuses on players who delivered standout performances late in the season.

Examples include:

Manny Ramirez – 94 OVR (2008 Dodgers)
David Wright – 92 OVR (2005 Mets)
Roy Halladay – 87 OVR (2007 Blue Jays)
Vladimir Guerrero – 85 OVR (2008 Angels)

These cards tend to emphasize strong hitting or pitching attributes, making them excellent early-game options when building your first competitive roster.

All-Star Series

The All-Star Series celebrates players who excelled during MLB All-Star seasons. These cards combine strong, well-rounded stats that perform consistently in multiple areas.

Confirmed players include:

George Brett – 91 OVR
Andrew McCutchen – 90 OVR
Fred Lynn – 90 OVR
Iván Rodríguez – 89 OVR
Joe Mauer – 89 OVR

These cards are especially useful for players looking for versatility early in the game cycle.

Breakout and Contributor Series

MLB The Show 26 also continues to highlight key moments and contributions through specialized card types.

Breakout Series

This set focuses on players during their first major breakout seasons:

Paul Goldschmidt – 90 OVR
Ron Santo – 85 OVR
Contributor Series

These cards recognize players who made a lasting impact on their teams or the sport:

Adrián Beltré – 91 OVR
Carlos Santana – 83 OVR
Larry Doby – 80 OVR

Both sets add variety by celebrating different milestones beyond traditional peak seasons.

Jolt Series: Early Team Captains

A new addition this year is the Jolt Series, designed to introduce early-game “captain” cards.

These players feature balanced stats and often provide boosts to themed lineups, making them ideal for synergy-based builds.

Confirmed names include:

Billy Wagner
Eric Gagné
Corey Kluber
Yu Darvish
Adam Jones

These cards are expected to play a key role during the early stages of Diamond Dynasty as players experiment with lineup bonuses.

World Baseball Classic Series

The World Baseball Classic (WBC) Series returns, celebrating international competition and global talent.

More than 130 WBC-themed cards are expected throughout the year, featuring unique designs inspired by national teams and tournament play.

Some confirmed stars include:

Shohei Ohtani
Fernando Tatis Jr.
Aaron Judge
Juan Soto
Nolan Arenado

This series adds an international flavor to Diamond Dynasty and highlights players on a global stage.

Signature Series and Elite Cards

For players aiming to build top-tier lineups, Signature Series cards remain the ultimate goal.

One of the standout reveals so far is a 99 OVR Signature card for Albert Pujols, based on his dominant 2008 season.

These cards typically feature elite stats across the board, making them some of the most powerful and sought-after items in the game.

Because of their rarity, they often require a significant investment. Players can earn MLB The Show 26 Stubs through gameplay or choose to buy MLB 26 Stubs to speed up progress and secure these high-end cards earlier.

With an expanded legend roster and a wide range of card series, MLB The Show 26 is shaping up to deliver one of the most content-rich Diamond Dynasty experiences yet.

Whether you’re collecting your favorite legends, building a themed lineup, or chasing elite Signature cards, there will be plenty of ways to customize your team and stay competitive throughout the season.

Continue Reading

How to Survive and Cure Frostbite in ARC Raiders: Essential Tips for Every Player

ARC Raiders is an action-packed cooperative game that combines strategic combat, resource management, and survival mechanics. One of the most challenging environmental hazards players face is Frostbite, a status effect that can severely impact health, mobility, and mission success. Knowing how to survive and cure Frostbite is essential not only for completing difficult missions but also for maximizing your acquisition of ARC Raiders Items. In this guide, we’ll break down the mechanics of Frostbite, tips for survival, and how to leverage crafting using ARC Raiders BPs to enhance your resilience.

Understanding Frostbite in ARC Raiders

Frostbite is a cold-based status effect that slows movement, reduces attack speed, and gradually drains health. It is most commonly encountered in icy zones and missions where environmental hazards are extreme. If left untreated, Frostbite can lead to mission failure, making it critical for players to manage this condition proactively.

Frostbite doesn’t just reduce performance temporarily; it can prevent players from accessing ARC Raiders Items or completing time-sensitive objectives. Therefore, understanding the signs of Frostbite and knowing how to counter it is crucial for both survival and efficient gameplay.

How to Survive Frostbite

Surviving Frostbite in ARC Raiders requires a combination of preparation, resource management, and strategic gameplay. Here are some essential tips:

1. Equip Proper Gear: Certain ARC Raiders Items provide resistance to environmental hazards like Frostbite. Investing in items that enhance cold resistance or overall survivability can make a significant difference.

2. Manage Your Position: Avoid lingering in areas with extreme cold whenever possible. Use the environment to your advantage by seeking shelter behind terrain features or moving quickly through high-risk zones.

3. Monitor Health Closely: Frostbite continuously drains health over time. Keep a close eye on your health bar and use healing items promptly. Waiting too long can result in critical health loss and failed extraction.

4. Coordinate With Your Team: Teamwork is vital in Frostbite-prone zones. Assign roles such as scout, medic, or support to ensure that the team can manage hazards effectively while still collecting ARC Raiders Items.

How to Cure Frostbite

Curing Frostbite in ARC Raiders requires specific consumables or abilities. The most common methods include:

·Healing Items: Consumables that remove or reduce status effects are essential. Make sure to stock up before entering icy missions.

·Special Abilities: Some character classes have abilities that can mitigate or remove Frostbite. Using these strategically during combat can prevent health loss and maintain performance.

·Crafted Solutions: Using ARC RaidersBPss, players can craft enhanced items or consumables that increase resistance to Frostbite or speed up recovery. Buying ARC Raiders BPs for crafting purposes is a smart strategy for players who want to guarantee access to these essential survival tools.

Why ARC Raiders Items Matter in Frostbite Zones

In addition to providing general combat advantages, certain ARC Raiders Items specifically enhance survivability in hazardous environments. Items that boost health regeneration, cold resistance, or mobility can dramatically increase the chances of completing missions safely. Players who fail to equip the right items may find it difficult to collect high-value resources or secure rare drops.

Many missions in icy zones also reward rare ARC Raiders’ items upon successful completion. Surviving Frostbite is therefore directly tied to your ability to maximize loot. Preparing ahead with the right gear and consumables ensures that you not only survive but also capitalize on the opportunity to acquire valuable items.

Crafting and Upgrading With ARC Raiders Bps

ARC Raiders BPs allow players to craft high-tier gear and consumables tailored to specific mission challenges, including Frostbite-prone areas. For example, crafting a specialized heating device or enhanced cold-resistant armor can provide a tactical advantage in icy zones.

Buying ARC Raiders BPs is a strategic option for players who want guaranteed access to critical items. Instead of relying solely on random drops, investing in Bps allows you to craft gear that complements your playstyle and mission objectives. This approach not only enhances survivability against Frostbite but also ensures access to powerful ARC Raiders Items that can boost overall mission efficiency.

Tips for Maximizing Frostbite Survival and Loot

1. Plan Your Mission Route: Avoid high-risk areas unless necessary, and identify safe zones for temporary refuge.

2. Prioritize Essential Items: Equip ARC Raiders with items that improve cold resistance, mobility, and health recovery before starting icy missions.

3. Use Crafting Strategically: Buy ARC Raiders Bps for consumables and gear that counter Frostbite effectively, ensuring long-term survival.

4. Coordinate Team Efforts: Assign responsibilities for managing hazards, reviving teammates, and securing loot for maximum efficiency.

Final Thoughts

Frostbite in ARC Raiders is a formidable challenge, but it doesn’t have to derail your progress. By understanding the mechanics, preparing the right ARC Raiders Items, and using ARC Raiders BPs to craft survival gear, players can navigate icy zones safely while maximizing loot and mission success.

Whether you’re hunting rare items, completing high-difficulty missions, or preparing for endgame content, surviving Frostbite is crucial. Strategic use of gear, consumables, and crafted tools ensures you remain effective in combat and can fully leverage the opportunities ARC Raiders provides. Master Frostbite survival, and you’ll unlock the full potential of both your ARC Raiders Items and your crafting capabilities.

Continue Reading

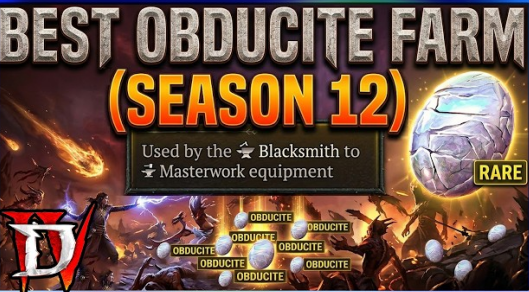
Diablo 4 Season 12: Why Strong Rooms Are the Best Obtoite Farm

Diablo 4

Diablo 4 Season 12 introduces a masterworking system that looks simple on the surface but quickly becomes resource-heavy in practice. As players push to perfect their gear, one material stands out as the biggest bottleneck: Obtoite. It doesn’t take long before your progression slows to a crawl, especially when upgrading high-end Diablo 4 Items that require large amounts of this resource.

To avoid constant interruptions in your upgrade flow, you need a reliable farming loop, one that not only generates Obtoite consistently but also provides steady gains in Diablo 4 Gold, gear upgrades, and progression materials. Strong Rooms offer exactly that, making them the most efficient farming method in Season 12 when used correctly.

Phase 1: Speedrunning Nightmare Dungeons

The foundation of this strategy begins with Nightmare Dungeons, but not in the traditional sense. Instead of clearing everything, your only goal is to locate the Horadric Strong Room as quickly as possible.

Efficiency here is key. Ignore side paths, skip unnecessary fights, and focus entirely on movement. The purple beam indicating a Strong Room should be your only priority. Using mobility skills aggressively will cut down your search time significantly, allowing you to enter more Strong Rooms per hour.

Low-value enemies and events are distractions unless they’re directly in your path. The faster you reach the Strong Room, the faster your Obtoite farming engine starts running.

Phase 2: Mastering Strong Room Efficiency

Once inside the Strong Room, your mindset should shift. This is not about collecting every drop, it’s about maintaining speed and maximizing output.

Focus on clearing enemy waves quickly and engaging portal encounters immediately. Avoid overkiting or playing too defensively, as this slows down your overall efficiency. When selecting buffs, prioritize anything that boosts your damage or speed rather than survivability.

The best option, when available, is the “Summon Special Demon” buff. This dramatically increases your clearing speed and helps fill your attunement bar faster. Other strong alternatives include movement speed boosts, evade enhancements, or AoE damage amplification, especially if your build is optimized for clearing groups.

Phase 3: Perfecting Pillar Ritual Flow

This is where many players lose efficiency without realizing it. The Pillar Ritual phase should feel like a continuous motion rather than a stop-and-go process.

Activate a pillar, eliminate enemies while moving forward, and immediately transition to the next one. Do not pause to pick up Diablo 4 Gold or items during this sequence. Loot can wait, momentum cannot.

Your primary goal is to fill the Horadric Attunement bar as quickly as possible. The faster you complete the ritual, the sooner you trigger the boss and secure your Obtoite rewards.

Remember this principle: momentum matters more than perfection. A smooth run yields far better results than a slow, overly cautious one.

Phase 4: Escalating Nightmare Dungeon Chains

After completing Strong Rooms, you’ll accumulate Escalating Nightmare Dungeon keys. These are essential for turning your farming loop into a self-sustaining cycle.

Each dungeon consists of three increasingly difficult floors, culminating in a boss fight against Astaroth. Treat each floor like a controlled speedrun. Efficient pathing is more important than clearing every enemy, so avoid dead ends and unnecessary detours.

Save your cooldowns for elite packs and be mindful of dungeon affixes. Overcommitting in dangerous situations can lead to unnecessary deaths, which slow down your farming efficiency.

Boss Focus: Astaroth

Astaroth is the final challenge in this loop, and while not overly complex mechanically, the fight requires consistency and control.

Damage-over-time builds, such as Bleed, Burn, or Shadow, perform particularly well here. Sustain is equally important, so prioritize healing, barriers, or fortify mechanics to maintain uptime. Mobility also helps avoid heavy-hitting attacks and keeps the fight manageable.

Defeating Astaroth is crucial because he provides high Obtoite rewards, along with additional keys that allow you to continue the farming loop without interruption.

Phase 5: Managing Sigil Powder

The only real risk to this entire system is running out of Sigil Powder. Without it, your loop comes to a halt.

To maintain your supply, regularly turn in objectives at the Tree of Whispers, which offers a steady and reliable source. Short Helltide runs are another effective option, providing both material variety and solid enemy density. Additionally, salvaging unused sigils and excess Diablo 4 Items will help replenish your reserves.

Keeping your Sigil Powder stocked ensures that your farming cycle remains uninterrupted.

Build Optimization During Farming

One of the most overlooked aspects of efficient farming is build progression. Your character s evolve alongside your farming loop.

If your clear speed feels slow, don’t wait for perfect gear, upgrade what you have. Focus on affixes that improve AoE damage, mobility, and resource generation. These stats have the biggest impact on your farming efficiency.

As you continue running Strong Rooms and dungeons, you’ll naturally collect better Diablo 4 Items. Use them to refine your build incrementally rather than waiting for ideal drops. This approach keeps your performance improving over time.

The Complete Farming Loop

The process can be broken down into a simple, repeatable cycle:

Run Nightmare Dungeons and quickly locate Strong Rooms

Clear Strong Rooms efficiently to farm Obtoite and keys

Chain Escalating Nightmare Dungeons for increased rewards

Defeat Astaroth to gain more materials and keys

Restock Sigil Powder and repeat

This loop creates a steady flow of resources, gear, and Diablo 4 Gold, ensuring continuous progression.

Final Insight

The biggest mistake players make in Season 12 is chasing massive, one-time farming sessions instead of building a consistent loop.

Strong Rooms excel because they provide reliable, repeatable rewards. By focusing on smooth execution rather than perfect runs, you reduce downtime and maintain a steady upgrade pace.

When done correctly, this method eliminates the frustration of hitting resource walls. Instead of waiting for Obtoite, you’ll always have enough to keep your gear progressing, making the masterworking system feel rewarding rather than restrictive.

Continue Reading

Diablo 4 Season 12: The Ultimate Speed Leveling Guide – Hit 60 in Under 2.5 Hours

“Look at this. Only 2 hours and 20 minutes to level 60 in Season 12. The new kill streak mechanics at the shrine and ceremony of slaughter are absolutely insane.”
Welcome, wanderer. I’m here to teach you exactly how to replicate this blistering pace and get your seasonal character to level 60 faster than you ever thought possible. If you ever find yourself short on resources to fuel your rapid progression, you can always buy Diablo 4 Gold to keep your gear and upgrades on track. No fluff, no wasted time—just pure efficiency.

Step 1: Character Setup – Don’t Skip This!

Create your new character and immediately:

1. Head to your wardrobe – Activate your pet. This sounds minor, but you’ll thank me later when you’re not manually picking up every piece of Fresh Meat.

2. Teleport to The Den – This is your seasonal hub and will become your second home.

Step 2: Mercenary Choices – The Secret Sauce

Here’s where most guides get it wrong. Usually, you’d pick Varyana as your main mercenary. Don’t do that. Enlist Varyana as a REINFORCEMENT instead. Why? Because we need:

· Mobility aspects

· Masterworking cash for Uber bosses later

· Your MAIN mercenary needs to be Subu – and here’s why:

· Subu provides boss summoning material caches (critical for endgame)

· But more importantly – he reveals enemy locations on your mini-map

This mini-map ability is absolutely essential for maintaining kill streaks. You’ll always know exactly where the densest packs are, or even that single straggler you need to keep your counter alive. “The bigger the killstreak is, the more experience you’re going to be getting. Look at this – 1,000+ kill streak just giving me more than half a level of experience.”

Phase 1: Level 1–35 – Normal Mode Blitz

Start in Normal Difficulty

Don’t waste time on Hard, Expert, or Penitent yet. The efficiency isn’t there.

1. Pick up your seasonal quest

2. Transform into the Butcher (yes, really)

3. Head into Helltide – Transform again and start racking up your first kill streak

4. You’ll likely hit level 7–8 before you even know what happened.

Helltide is Your Home (Levels 1–35)

Why Helltide? Because you can transform into the Butcher repeatedly using Meaty Offerings.

How to get Meaty Offerings:

· Open Chests of Mysteries in Helltide

· Kill Hellborn enemies (the ones that drop from the sky when you fill your meter)

· They can also drop in Slaughterhouses (but we’ll get to that)

· IMPORTANT: Save your Fresh Meat! Don’t spend it yet. Wait until you hit Torment tiers – you can gamble for unique and greater affixed equipment once you’re there. Think of it as a second Purveyor of Curiosities, but for Bloodied items.

The PvP Area – Your Secret XP Farm

1. The Ceremony of Slaughter in PvP zones is an absolute JACKPOT if you’re alone.

· Events happen roughly every 15 minutes

· Show up 2 minutes early and start circling – the density is insane

· Minions keep spawning; you keep killing

· Build up a monstrous kill streak

2. Most of my XP from 1–35 came from:

· Kill streaking

· Spending time in PvP areas

· Pro Tip: Even if the event isn’t active, just running around PvP zones has incredible density. It’s always worth your time.

Phase 2: Level 35 – Bump to Hard Difficulty

At level 35, it’s time to step it up.

Clear the Vault of the Crucible (Capstone Dungeon)

We’re doing this at level 35 specifically so it’s easy. No struggling, no deaths wasting time.

Tactic: Only kill what’s necessary. Run past everything else. Speed > completionism.

Now You’re in Hard Difficulty – Time for Strongholds

Strongholds at this point will give you a full level – and then some.

· I did four strongholds total

· Didn’t need more because Helltide and Ceremony of Slaughter came back up in Hard mode

The Undercity – Kill Streak Heaven

If you pick up tributes early (especially XP tributes), head to the Undercity.

· It’s incredibly easy to build massive kill streaks here

· 500, 700, 800, even 1,000+ is possible

· Combine with attunement bonuses for huge XP payouts

· You’ll need to do an Undercity for a skill point anyway

Slaughterhouses – The Catch

Here’s the truth about Slaughterhouses: they don’t actually give much experience. Only do SIX Slaughterhouses. Why?

· You need them for seasonal rank progression

· After that? Ignore them completely. Not worth your time.

Phase 3: Smoldering Ash Investments

Your first points are critical:

1. Urn of Meat – Priority #1. We want as much Fresh Meat as possible.

2. Urn of Bloodied Keys – This helps you stockpile boss summoning materials early.

Phase 4: Level 55 – Penitent Difficulty

At level 55, swap to Penitent and clear Hellish Descent.

· You’re 5 levels overleveled – this will be a cakewalk

· This unlocks your third seasonal rank

Should You Stay in Penitent?

Technically you could clear something like Sellers on Penitent or higher. But honestly? Drop back down to Hard. Continue slamming Helltides when they’re up. Do another stronghold or two. Get those last few levels efficiently.

Phase 5: Level 60 – Welcome to Torment

You’ve hit 60. Now the real fun begins.

Step 1: Hit the Purveyor of Curiosities

· Run to the Purveyor

· Gamble for your build-defining unique

“This cost me 700 obols to finally get” – be patient, it’ll happen

Step 2: Hit Gea Kul

· Spend all your saved Fresh Meat

· Target the same unique (or a different build-defining one)

· You’ll definitely end up with at least one of them

Step 3: Back to The Den

Check for:

· Greater affix items

· Masterworking caches

· Missing aspects

· Boss summoning caches

· Utility caches (hoping for something like Aspect of Cursed Aura)

Advanced Kill Streak Tactics

How to Hit 250/1000+ Kill Streaks

The easiest method:

1. Run around and build a 400–500 kill streak naturally

2. Chain Meaty Offerings into each other

3. No Meaty Offerings? Look for:

· Life-sucking spirals

· Fire spirals

· My record: Fire spiral → Life-sucking spiral → Another life-sucking spiral → Two Butchers in a row

4. Result: 4,000+ kill streak.

“It’s super easy. You just need to know what to look out for.”

Torment 1 XP Farming

Once in Torment 1:

· Head to Helltide

· Chain with other players – this is crucial

· Altars in a row → Butcher transformations back-to-back

· Chain Hell Maiden events

“I go butcher. He goes butcher. We go butcher. That was so much experience.” My characters were sitting at 90 paragon points in no time. It couldn’t be simpler.

Critical Warnings & Tips

Save Your Bloodied Items!

This is where I messed up so you don’t have to.

· Keep a full set of MAGIC Bloodied items.

· Keep a full set of RARE Bloodied items.

“Yes, I’m level 60, Torment 2, 100 paragon points, and I don’t have this skill point. I didn’t do this and I’ll have to now painstakingly gather them.” I’ll probably do it on a secondary character – it’s easier to collect on a fresh character than trying to backtrack at level 60.

Torment Bossing – No Materials Needed?

Once you’re in Torment 1, here’s something insane: “My character is able to already destroy tier 2 tormented bosses. I can summon them now and I won’t even need boss materials.”

Just go into:

· Hall of the Penitent

· Harbinger’s Den

· Nuke them. Boom. Loot without needing Shards of Agony or Porn Hearts (or whatever those materials are called).

The 4-Hour Challenge

“Yes, I’m now 4 hours into the game. 4 hours. My character is able to already destroy tier 2 tormented bosses.” Follow this guide, and you’ll be there too.

Summary Checklist

Summary Checklist

Levels 1–35 (Normal)

· Set Subu as main mercenary, Varyana as reinforcement

· Seasonal quest → Helltide → Transform into Butcher

· Farm Helltide for Meaty Offerings

· Hit PvP zones for Ceremony of Slaughter every 15 mins

· Save Fresh Meat for Torment

Level 35

· Clear Vault of the Crucible (Capstone)

· Bump to Hard difficulty

· 4 Strongholds (full levels each)

· Undercity for kill streaks

· 6 Slaughterhouses (for seasonal rank only)

· Smoldering Ash

· Urn of Meat

· Urn of Bloodied Keys

Level 55

· Clear Hellish Descent

· Drop back to Hard for final levels

Level 60 / Torment 1

· Purveyor of Curiosities for unique

· Gea Kul (spend Fresh Meat)

· Check The Den for caches/aspects

· Chain Helltide events with others

· Destroy Tormented bosses (no materials needed!)

If you need a boost, visit MMOEXP to buy cheap Diablo 4 Items and accelerate your endgame setup even faster.

Continue Reading

How to Get the Uncharged Scythe of Vitur in Old School RuneScape

The Scythe of Vitur is one of the most iconic and powerful melee weapons in Old School RuneScape, widely regarded as the pinnacle of endgame PvM gear. Known for its devastating damage output against large enemies, the Scythe dominates high-level boss encounters where size and hitbox mechanics come into play.

Before it becomes the terrifying weapon players recognize, every Scythe begins as an uncharged Scythe of Vitur. Obtaining this version is the most difficult and time-consuming part of the process, requiring either immense skill, patience, or a massive amount of OSRS gold.

What Is the Scythe of Vitur?

The Scythe of Vitur is a two-handed slash weapon designed specifically for endgame PvM content. Its defining feature is its ability to hit up to three times per attack when used against large targets. Each hit rolls independently, allowing the Scythe to output extraordinary damage in the right situations.

While incredibly powerful, an uncharged Scythe cannot be used effectively. It must first be charged with blood runes to fuel both its standard attacks and its special mechanics. Even so, acquiring the uncharged Scythe is the hardest step-and the main barrier for most players.

Where Does the Scythe of Vitur Come From?

The only way to obtain an uncharged Scythe of Vitur is through the Theatre of Blood (ToB), the most challenging raid-style PvM activity in OSRS. There are no quest rewards, NPC vendors, or alternate sources. If you want to earn one yourself, Theatre of Blood is mandatory.

Located in Meiyerditch within the Morytania region, ToB is a team-based raid designed for experienced players with excellent mechanical skill, coordination, and gear.

Requirements to Enter Theatre of Blood

To participate in Theatre of Blood, you’ll need:

·Completion of A Taste of Hope

·High combat stats (90+ recommended across melee, ranged, and magic)

·Strong PvM gear and consumables

·A coordinated team (solo attempts are extremely difficult and not recommended)

How to Get the Scythe of Vitur (Uncharged)

1. Complete Theatre of Blood Runs

The Scythe of Vitur is a unique reward obtained from the completion chest after defeating Verzik Vitur, the final boss of Theatre of Blood. Loot is distributed based on performance, survival, and contribution throughout the raid.

Only one unique item can appear per raid completion, and the Scythe is the rarest item on the loot table.

2. Understand the Drop Rate

The Scythe of Vitur has an estimated drop rate of around 1 in 650 raids in standard mode. This makes it one of the rarest and most prestigious items in the entire game.

Because rewards are shared among team members, your odds are influenced by:

·Team size

·Individual performance

·Total raid completions

Even highly skilled players should expect a long grind unless luck is firmly on their side.

3. Survive and Contribute Consistently

While Theatre of Blood drops are RNG-based, staying alive and contributing damage improves overall raid efficiency. Frequent deaths slow completion times and can indirectly impact loot eligibility.

Players who master mechanics, minimize mistakes, and consistently finish runs are far more likely to see long-term success.

Buying the Scythe of Vitur Instead

For many players, completing hundreds of Theatre of Blood runs simply isn’t realistic. Fortunately, the uncharged Scythe of Vitur is tradeable and can be purchased directly from the Grand Exchange.

The downside? The price often sits in the billions of GP, depending on the market.

This is where efficient wealth-building becomes essential. Some players grind high-profit PvM, while others choose to buy OSRS gold to reach their goals faster. Having enough OSRS gold allows you to skip the raid grind entirely and immediately access one of the strongest melee weapons in the game.

Many experienced players recommend well-known providers when looking to buy OSRS items or gold safely. Regardless of your method, acquiring sufficient GP opens the door to top-tier gear without months of raiding.

Charging the Scythe of Vitur

Once you obtain the uncharged Scythe, it must be powered using blood runes. Every attack consumes charges, making the Scythe one of the most expensive weapons to maintain in OSRS.

Important things to know:

·Blood runes are used directly on the Scythe to add charges

·Charges are consumed with each swing

·The upkeep cost is high and adds up quickly

Because of this, the Scythe is best reserved for high-value PvM encounters where its damage output justifies the expense. It is not recommended for casual Slayer or low-profit activities.

Is the Scythe of Vitur Worth It?

For endgame PvM players, the answer is yes. The Scythe excels in:

·Theatre of Blood

·Chambers of Xeric (specific bosses)

·High-level encounters such as Nex and Corporeal Beast

For mid-level players or those without a steady GP income, the Scythe can feel uncharged version may serve as a status symbol, but its true value lies in knowing when and where to use it efficiently.

Final Thoughts

Getting the Scythe of Vitur (uncharged) in OSRS is a true test of dedication, skill, or wealth. Whether you grind hundreds of Theatre of Blood runs or acquire it through the Grand Exchange by choosing to buy OSRS items and gold from trusted sources, the Scythe remains one of the most prestigious weapons in the game.

However you obtain it, wielding a Scythe of Vitur marks your place among OSRS’s elite PvM players.

Continue Reading