Anathema of the Primes is a powerful unique two-handed sword exclusive to Diablo 4’s endgame meta. This iconic weapon boasts exceptional damage stats and unique affixes that greatly boost crowd control and boss damage output. It is a top-tier gear choice for many melee and hybrid builds, making it highly sought after by endgame players.
Unlike common random-drop unique items, Anathema of the Primes has fixed drop sources. Blind open-world farming wastes massive time and resources. Mastering targeted farming methods is the key to obtaining this Diablo 4 Items in the shortest time possible.
Understand the Core Drop Source
Currently, the only reliable boss that drops Anathema of the Primes is Echo of Andariel. All other in-game activities only offer extremely low drop chances, which are not worthy of dedicated farming. Echo of Andariel resides in Hanged Man’s Hall in Kehjistan, serving as the primary target for all fast-farm strategies.
A critical rule for drops is the difficulty threshold. This unique sword only drops on Torment 1 or higher difficulty. Lower world tiers and difficulty modes have zero drop rate, so players must unlock and enter Torment difficulty before starting their farming journey.
Farm Greater Lair Keys Efficiently
Challenging Echo of Andariel and looting her treasure hoard requires a Greater Lair Key. This key is the core prerequisite for repeated Andariel runs, so efficient key farming directly speeds up weapon acquisition.
Greater Lair Keys drop from lesser endgame lair bosses, including Lord Zir, Grigoire, and the Beast in Ice. Players can farm these bosses in rotation to steadily accumulate keys. To further boost key drop rates, push difficulty to Torment 6 or higher. Higher Torment tiers significantly increase rare key drop chances without excessive difficulty spikes for well-built characters.
Avoid farming on low Torment tiers. The sparse key drops will drastically slow down your overall farming progress. Always balance your build’s survivability and difficulty to maintain consistent run speeds.
Optimize Echo of Andariel Runs
Once you have a stock of Greater Lair Keys, focus on streamlined Echo of Andariel runs. Build a fast, burst-oriented character setup to clear the boss within seconds. High movement speed and single-target damage are essential to cut down run time.
Skip unnecessary trash mobs in Hanged Man’s Hall. Head straight to the boss arena to trigger the fight. After defeating Andariel, use the Greater Lair Key to open her treasure hoard, which holds the highest chance of dropping Anathema of the Primes.
Alternative Supplemental Farming Methods
For players waiting for key respawns or wanting extra drop chances, Helltide Events are a great supplemental option. Active every hour, Helltides let players collect Aberrant Cinders to open premium chests. Though the drop rate is lower than Andariel runs, it adds extra chances without extra key costs.
The Horadric Cube system also offers a backup method. Players can craft and reforge rare two-handed swords through the cube. While not guaranteed, this method lets players utilize cheap Diablo 4 materials to chase the unique sword passively.
Final Fast-Farm Tips
Prioritize Torment 6+ Andariel runs as your main farming loop. Stock up 10 to 20 Greater Lair Keys in advance to avoid frequent key farming interruptions. Optimize your build for speed and burst damage to maximize daily run counts.
Avoid random dungeon and open-world farming. Sticking to targeted boss fights and supplemental Helltide activities is the fastest and most efficient way to secure Anathema of the Primes in Diablo 4’s endgame.
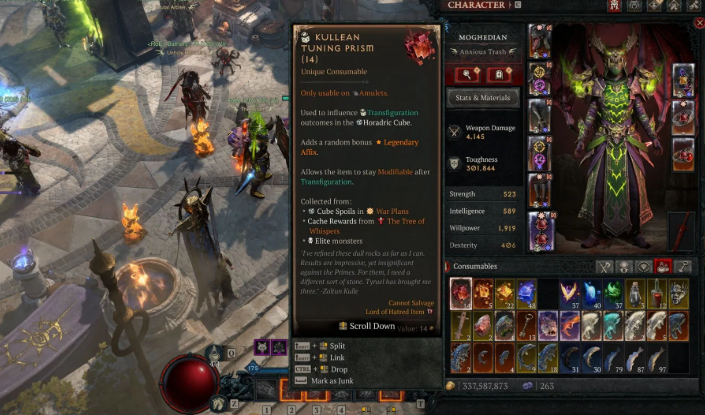
Crafting in Diablo 4 Season 13 has become far more advanced thanks to the introduction of the Horadric Cube and Tuning Prism systems. Instead of relying entirely on random drops, players can now manipulate gear affixes more strategically by targeting specific stat categories during crafting. Understanding affix categories is now one of the most important parts of optimizing endgame builds, especially for players pushing higher Torment difficulties and maximizing powerful Diablo 4 Items.
However, many players still misunderstand how affix categories actually work. The names of stats can often be misleading, and using the wrong Tuning Prism can easily waste expensive crafting materials. Since crafting costs continue increasing in Season 13, efficient players are becoming much more careful about resource management. Some even choose to buy D4 materials so they can focus more on build optimization and less on repetitive farming.
This guide explains every major affix category in Diablo 4 and how Tuning Prism crafting works in the current meta.
What Are Affix Categories in Diablo 4?
Affix categories are stat groupings used by the Horadric Cube crafting system. Each affix belongs to a specific category, and Tuning Prisms interact with these categories during rerolls and affix manipulation.
The main categories include:
·Offensive
·Defensive
·Utility
·Resource
·Mobility
Some affixes also fall into specialized subcategories like skill affixes or core-stat targeting. Understanding which stats belong to which category is critical because the Cube recipes use category rules to determine what gets rerolled or modified.
Offensive Affix Category
Offensive affixes focus on increasing damage output and combat effectiveness. These are some of the most valuable stats for endgame builds because they directly improve clear speed and boss damage.
Common Offensive affixes include:
·Critical Strike Chance
·Critical Strike Damage
·Vulnerable Damage
·Attack Speed
·Damage Over Time
·Weapon Damage
·Elemental Damage Multipliers
·Thorns
·Core Stat bonuses like Strength or Intelligence
Many players target Offensive affixes when crafting weapons, gloves, rings, and amulets. These stats are especially important for builds like:
·Rapid Fire Rogue
·Whirlwind Barbarian
·Chain Lightning Sorcerer
·Minion Necromancer
Optimizing offensive Diablo 4 Items often requires repeated rerolls and expensive crafting attempts, which is why crafting resources are now considered one of the most valuable currencies in the game.
Defensive Affix Category
Defensive affixes focus on survivability and mitigation.
These include:
·Armor
·Damage Reduction
·Maximum Life
·Dodge Chance
·Life Regen
·Life on Hit
·Elemental Resistances
·All Resistance bonuses
As Torment scaling becomes more dangerous in Season 13, defensive stats have become increasingly important. High-end builds can no longer rely entirely on raw damage output. Players now balance survivability and offense much more carefully than in previous seasons.
Many players specifically craft defensive affixes onto:
·Chest armor
·Pants
·Helms
·Shields
This allows builds to survive elite affixes, boss mechanics, and high-tier dungeon encounters more consistently.
Utility Affix Category
Utility affixes support overall build consistency and gameplay quality.
This category includes:
·Cooldown Reduction
·Lucky Hit Chance
·Potion Capacity
·Healing Received
·Fortify Generation
·Skill Rank bonuses
·Impairment Reduction
Cooldown Reduction remains one of the strongest utility stats in Diablo 4 because it dramatically improves skill uptime for many meta builds.
Players crafting Utility-focused Diablo 4 Items often prioritize:
·Amulets
·Helms
·Gloves
These slots commonly roll valuable cooldown and skill-enhancing affixes.
Community discussions also note that some Utility affixes behave inconsistently during crafting, especially Fortify Generation and Impairment Reduction. Several Reddit users recommend testing rerolls on lower-value items before risking expensive endgame gear.
Resource Affix Category
Resource affixes help maintain skill usage and improve resource sustainability.
Common Resource affixes include:
·Resource Generation
·Resource Cost Reduction
·Maximum Resource
·Lucky Hit Restore Resource
·Resource per Kill
These affixes are especially valuable for:
·Sorcerers
·Rogues
·Spiritborn builds
·Core-skill spam setups
Resource management became even more important after Season 13 balance changes increased the importance of sustained damage output during longer boss fights.
Many players now prioritize resource affixes on rings and amulets to maintain smooth gameplay loops.
Mobility Affix Category
Mobility affixes focus on movement speed and evade mechanics.
This category includes:
·Movement Speed
·Evade Cooldown Reduction
·Additional Evade Charges
·Evade Movement bonuses
Mobility stats are often underestimated, but they dramatically improve:
·Dungeon clear speed
·Helltide farming
·Boss positioning
·Seasonal efficiency
Fast farming builds frequently invest heavily into movement speed because faster clears generate more Diablo 4 Items, gold, and crafting materials per hour.
How Tuning Prisms Work
Tuning Prisms interact with affix categories during Horadric Cube crafting. Different prism types influence different categories of stats.
For example:
·Offensive prisms target damage-related affixes
·Defensive prisms target survivability stats
·Utility prisms target cooldowns and support bonuses
The important detail is that the Cube recipe itself determines how the prism behaves.
According to community testing:
·Focused Rerolls replace an affix with another from the same category
·Chaotic Rerolls remove a targeted category affix and replace it with a random category stat
This distinction is extremely important because misunderstanding the recipe can ruin valuable gear.
Why Crafting Materials Matter More Than Ever
The Horadric Cube system is powerful, but it is also expensive.
Players now spend huge amounts of:
·Gold
·Forgotten Souls
·Legendary crafting components
·Tuning Prisms
·Endgame reagents
Perfectly optimizing Diablo 4 Items can require dozens or even hundreds of rerolls.
Because of these costs, many players choose to buy D4 materials to speed up crafting and reduce repetitive farming time. This allows them to focus more heavily on pushing endgame content and experimenting with new builds.
Best Items to Craft With Tuning Prisms
The best crafting targets are usually:
·Amulets
·Rings
·Gloves
·Weapons
These slots have the highest impact on build performance because they can roll multiple high-value affixes simultaneously.
Players should avoid wasting expensive prisms on weak or temporary gear. Most veteran players recommend saving advanced crafting resources for:
·Greater Affix items
·Mythic Uniques
·High-item-power Ancestral gear
Final Thoughts
Affix categories are now one of the core systems driving Diablo 4’s endgame crafting. Understanding how Offensive, Defensive, Utility, Resource, and Mobility affixes interact with Tuning Prism recipes is essential for optimizing gear efficiently.
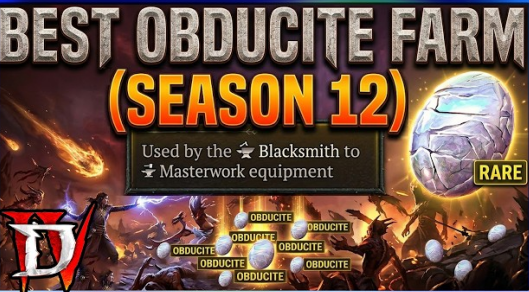
Diablo 4 Season 12 introduces a masterworking system that looks simple on the surface but quickly becomes resource-heavy in practice. As players push to perfect their gear, one material stands out as the biggest bottleneck: Obtoite. It doesn’t take long before your progression slows to a crawl, especially when upgrading high-end Diablo 4 Items that require large amounts of this resource.
To avoid constant interruptions in your upgrade flow, you need a reliable farming loop, one that not only generates Obtoite consistently but also provides steady gains in Diablo 4 Gold, gear upgrades, and progression materials. Strong Rooms offer exactly that, making them the most efficient farming method in Season 12 when used correctly.
Phase 1: Speedrunning Nightmare Dungeons
The foundation of this strategy begins with Nightmare Dungeons, but not in the traditional sense. Instead of clearing everything, your only goal is to locate the Horadric Strong Room as quickly as possible.
Efficiency here is key. Ignore side paths, skip unnecessary fights, and focus entirely on movement. The purple beam indicating a Strong Room should be your only priority. Using mobility skills aggressively will cut down your search time significantly, allowing you to enter more Strong Rooms per hour.
Low-value enemies and events are distractions unless they’re directly in your path. The faster you reach the Strong Room, the faster your Obtoite farming engine starts running.
Phase 2: Mastering Strong Room Efficiency
Once inside the Strong Room, your mindset should shift. This is not about collecting every drop, it’s about maintaining speed and maximizing output.
Focus on clearing enemy waves quickly and engaging portal encounters immediately. Avoid overkiting or playing too defensively, as this slows down your overall efficiency. When selecting buffs, prioritize anything that boosts your damage or speed rather than survivability.
The best option, when available, is the “Summon Special Demon” buff. This dramatically increases your clearing speed and helps fill your attunement bar faster. Other strong alternatives include movement speed boosts, evade enhancements, or AoE damage amplification, especially if your build is optimized for clearing groups.
Phase 3: Perfecting Pillar Ritual Flow
This is where many players lose efficiency without realizing it. The Pillar Ritual phase should feel like a continuous motion rather than a stop-and-go process.
Activate a pillar, eliminate enemies while moving forward, and immediately transition to the next one. Do not pause to pick up Diablo 4 Gold or items during this sequence. Loot can wait, momentum cannot.
Your primary goal is to fill the Horadric Attunement bar as quickly as possible. The faster you complete the ritual, the sooner you trigger the boss and secure your Obtoite rewards.
Remember this principle: momentum matters more than perfection. A smooth run yields far better results than a slow, overly cautious one.
Phase 4: Escalating Nightmare Dungeon Chains
After completing Strong Rooms, you’ll accumulate Escalating Nightmare Dungeon keys. These are essential for turning your farming loop into a self-sustaining cycle.
Each dungeon consists of three increasingly difficult floors, culminating in a boss fight against Astaroth. Treat each floor like a controlled speedrun. Efficient pathing is more important than clearing every enemy, so avoid dead ends and unnecessary detours.
Save your cooldowns for elite packs and be mindful of dungeon affixes. Overcommitting in dangerous situations can lead to unnecessary deaths, which slow down your farming efficiency.
Boss Focus: Astaroth
Astaroth is the final challenge in this loop, and while not overly complex mechanically, the fight requires consistency and control.
Damage-over-time builds, such as Bleed, Burn, or Shadow, perform particularly well here. Sustain is equally important, so prioritize healing, barriers, or fortify mechanics to maintain uptime. Mobility also helps avoid heavy-hitting attacks and keeps the fight manageable.
Defeating Astaroth is crucial because he provides high Obtoite rewards, along with additional keys that allow you to continue the farming loop without interruption.
Phase 5: Managing Sigil Powder
The only real risk to this entire system is running out of Sigil Powder. Without it, your loop comes to a halt.
To maintain your supply, regularly turn in objectives at the Tree of Whispers, which offers a steady and reliable source. Short Helltide runs are another effective option, providing both material variety and solid enemy density. Additionally, salvaging unused sigils and excess Diablo 4 Items will help replenish your reserves.
Keeping your Sigil Powder stocked ensures that your farming cycle remains uninterrupted.
Build Optimization During Farming
One of the most overlooked aspects of efficient farming is build progression. Your character s evolve alongside your farming loop.
If your clear speed feels slow, don’t wait for perfect gear, upgrade what you have. Focus on affixes that improve AoE damage, mobility, and resource generation. These stats have the biggest impact on your farming efficiency.
As you continue running Strong Rooms and dungeons, you’ll naturally collect better Diablo 4 Items. Use them to refine your build incrementally rather than waiting for ideal drops. This approach keeps your performance improving over time.
The Complete Farming Loop
The process can be broken down into a simple, repeatable cycle:
Run Nightmare Dungeons and quickly locate Strong Rooms
Clear Strong Rooms efficiently to farm Obtoite and keys
Chain Escalating Nightmare Dungeons for increased rewards
Defeat Astaroth to gain more materials and keys
Restock Sigil Powder and repeat
This loop creates a steady flow of resources, gear, and Diablo 4 Gold, ensuring continuous progression.
Final Insight
The biggest mistake players make in Season 12 is chasing massive, one-time farming sessions instead of building a consistent loop.
Strong Rooms excel because they provide reliable, repeatable rewards. By focusing on smooth execution rather than perfect runs, you reduce downtime and maintain a steady upgrade pace.
When done correctly, this method eliminates the frustration of hitting resource walls. Instead of waiting for Obtoite, you’ll always have enough to keep your gear progressing, making the masterworking system feel rewarding rather than restrictive.
“Look at this. Only 2 hours and 20 minutes to level 60 in Season 12. The new kill streak mechanics at the shrine and ceremony of slaughter are absolutely insane.” Welcome, wanderer. I’m here to teach you exactly how to replicate this blistering pace and get your seasonal character to level 60 faster than you ever thought possible. If you ever find yourself short on resources to fuel your rapid progression, you can always buy Diablo 4 Gold to keep your gear and upgrades on track. No fluff, no wasted time—just pure efficiency.
Step 1: Character Setup – Don’t Skip This!
Create your new character and immediately:
1. Head to your wardrobe – Activate your pet. This sounds minor, but you’ll thank me later when you’re not manually picking up every piece of Fresh Meat.
2. Teleport to The Den – This is your seasonal hub and will become your second home.
Step 2: Mercenary Choices – The Secret Sauce
Here’s where most guides get it wrong. Usually, you’d pick Varyana as your main mercenary. Don’t do that. Enlist Varyana as a REINFORCEMENT instead. Why? Because we need:
· Mobility aspects
· Masterworking cash for Uber bosses later
· Your MAIN mercenary needs to be Subu – and here’s why:
· Subu provides boss summoning material caches (critical for endgame)
· But more importantly – he reveals enemy locations on your mini-map
This mini-map ability is absolutely essential for maintaining kill streaks. You’ll always know exactly where the densest packs are, or even that single straggler you need to keep your counter alive. “The bigger the killstreak is, the more experience you’re going to be getting. Look at this – 1,000+ kill streak just giving me more than half a level of experience.”
Phase 1: Level 1–35 – Normal Mode Blitz
Start in Normal Difficulty
Don’t waste time on Hard, Expert, or Penitent yet. The efficiency isn’t there.
1. Pick up your seasonal quest
2. Transform into the Butcher (yes, really)
3. Head into Helltide – Transform again and start racking up your first kill streak
4. You’ll likely hit level 7–8 before you even know what happened.
Helltide is Your Home (Levels 1–35)
Why Helltide? Because you can transform into the Butcher repeatedly using Meaty Offerings.
How to get Meaty Offerings:
· Open Chests of Mysteries in Helltide
· Kill Hellborn enemies (the ones that drop from the sky when you fill your meter)
· They can also drop in Slaughterhouses (but we’ll get to that)
· IMPORTANT: Save your Fresh Meat! Don’t spend it yet. Wait until you hit Torment tiers – you can gamble for unique and greater affixed equipment once you’re there. Think of it as a second Purveyor of Curiosities, but for Bloodied items.
The PvP Area – Your Secret XP Farm
1. The Ceremony of Slaughter in PvP zones is an absolute JACKPOT if you’re alone.
· Events happen roughly every 15 minutes
· Show up 2 minutes early and start circling – the density is insane
· Minions keep spawning; you keep killing
· Build up a monstrous kill streak
2. Most of my XP from 1–35 came from:
· Kill streaking
· Spending time in PvP areas
· Pro Tip: Even if the event isn’t active, just running around PvP zones has incredible density. It’s always worth your time.
Phase 2: Level 35 – Bump to Hard Difficulty
At level 35, it’s time to step it up.
Clear the Vault of the Crucible (Capstone Dungeon)
We’re doing this at level 35 specifically so it’s easy. No struggling, no deaths wasting time.
Tactic: Only kill what’s necessary. Run past everything else. Speed > completionism.
Now You’re in Hard Difficulty – Time for Strongholds
Strongholds at this point will give you a full level – and then some.
· I did four strongholds total
· Didn’t need more because Helltide and Ceremony of Slaughter came back up in Hard mode
The Undercity – Kill Streak Heaven
If you pick up tributes early (especially XP tributes), head to the Undercity.
· It’s incredibly easy to build massive kill streaks here
· 500, 700, 800, even 1,000+ is possible
· Combine with attunement bonuses for huge XP payouts
· You’ll need to do an Undercity for a skill point anyway
Slaughterhouses – The Catch
Here’s the truth about Slaughterhouses: they don’t actually give much experience. Only do SIX Slaughterhouses. Why?
· You need them for seasonal rank progression
· After that? Ignore them completely. Not worth your time.
Phase 3: Smoldering Ash Investments
Your first points are critical:
1. Urn of Meat – Priority #1. We want as much Fresh Meat as possible.
2. Urn of Bloodied Keys – This helps you stockpile boss summoning materials early.
Phase 4: Level 55 – Penitent Difficulty
At level 55, swap to Penitent and clear Hellish Descent.
· You’re 5 levels overleveled – this will be a cakewalk
· This unlocks your third seasonal rank
Should You Stay in Penitent?
Technically you could clear something like Sellers on Penitent or higher. But honestly? Drop back down to Hard. Continue slamming Helltides when they’re up. Do another stronghold or two. Get those last few levels efficiently.
Phase 5: Level 60 – Welcome to Torment
You’ve hit 60. Now the real fun begins.
Step 1: Hit the Purveyor of Curiosities
· Run to the Purveyor
· Gamble for your build-defining unique
“This cost me 700 obols to finally get” – be patient, it’ll happen
Step 2: Hit Gea Kul
· Spend all your saved Fresh Meat
· Target the same unique (or a different build-defining one)
· You’ll definitely end up with at least one of them
Step 3: Back to The Den
Check for:
· Greater affix items
· Masterworking caches
· Missing aspects
· Boss summoning caches
· Utility caches (hoping for something like Aspect of Cursed Aura)
Advanced Kill Streak Tactics
How to Hit 250/1000+ Kill Streaks
The easiest method:
1. Run around and build a 400–500 kill streak naturally
2. Chain Meaty Offerings into each other
3. No Meaty Offerings? Look for:
· Life-sucking spirals
· Fire spirals
· My record: Fire spiral → Life-sucking spiral → Another life-sucking spiral → Two Butchers in a row
4. Result: 4,000+ kill streak.
“It’s super easy. You just need to know what to look out for.”
Torment 1 XP Farming
Once in Torment 1:
· Head to Helltide
· Chain with other players – this is crucial
· Altars in a row → Butcher transformations back-to-back
· Chain Hell Maiden events
“I go butcher. He goes butcher. We go butcher. That was so much experience.” My characters were sitting at 90 paragon points in no time. It couldn’t be simpler.
Critical Warnings & Tips
Save Your Bloodied Items!
This is where I messed up so you don’t have to.
· Keep a full set of MAGIC Bloodied items.
· Keep a full set of RARE Bloodied items.
“Yes, I’m level 60, Torment 2, 100 paragon points, and I don’t have this skill point. I didn’t do this and I’ll have to now painstakingly gather them.” I’ll probably do it on a secondary character – it’s easier to collect on a fresh character than trying to backtrack at level 60.
Torment Bossing – No Materials Needed?
Once you’re in Torment 1, here’s something insane: “My character is able to already destroy tier 2 tormented bosses. I can summon them now and I won’t even need boss materials.”
Just go into:
· Hall of the Penitent
· Harbinger’s Den
· Nuke them. Boom. Loot without needing Shards of Agony or Porn Hearts (or whatever those materials are called).
The 4-Hour Challenge
“Yes, I’m now 4 hours into the game. 4 hours. My character is able to already destroy tier 2 tormented bosses.” Follow this guide, and you’ll be there too.
Summary Checklist
Summary Checklist
Levels 1–35 (Normal)
· Set Subu as main mercenary, Varyana as reinforcement
· Seasonal quest → Helltide → Transform into Butcher
· Farm Helltide for Meaty Offerings
· Hit PvP zones for Ceremony of Slaughter every 15 mins
· Save Fresh Meat for Torment
Level 35
· Clear Vault of the Crucible (Capstone)
· Bump to Hard difficulty
· 4 Strongholds (full levels each)
· Undercity for kill streaks
· 6 Slaughterhouses (for seasonal rank only)
· Smoldering Ash
· Urn of Meat
· Urn of Bloodied Keys
Level 55
· Clear Hellish Descent
· Drop back to Hard for final levels
Level 60 / Torment 1
· Purveyor of Curiosities for unique
· Gea Kul (spend Fresh Meat)
· Check The Den for caches/aspects
· Chain Helltide events with others
· Destroy Tormented bosses (no materials needed!)
If you need a boost, visit MMOEXP to buy cheap Diablo 4 Items and accelerate your endgame setup even faster.
The Twin Strikes is a top-tier ancestral unique glove designed exclusively for Barbarians in Diablo 4 Season 11. With its powerful offensive stats, attack-speed scaling, and devastating Double Swing synergy, this item is perfect for melee builds focused on rapid attacks and burst windows. For players aiming to maximize their Barbarian’s DPS, understanding how to efficiently farm Twin Strikes is essential. This guide breaks down its modifiers, unique effects, and the best farming methods.
What are Twin Strikes in Diablo 4?
Twin Strikes is an offense-focused unique glove that amplifies the Barbarian’s Double Swing skill. If your build relies on spamming Double Swing, this glove becomes a near-essential power spike.
By improving attack speed, adding extra hits, and boosting Strength, Twin Strikes turns normal rotations into high-burst damage sequences, especially when combined with Vulnerable, Berserking, or crit-focused setups.
Twin Strikes Unique Modifiers
The base roll ranges for Twin Strikes include:
·+20% Attack Speed (up to +30% with mastercrafting)
·+20% Chance for Double Swing to Deal Double Damage (up to +30% with mastercrafting)
·+121 Strength (up to +182 with mastercrafting)
·+3 to Double Swing (up to +4 with mastercrafting)
These modifiers directly enhance Double Swing DPS, increasing both sustained damage and high-burst spikes. The Strength bonus benefits all Barbarian abilities, while the double-damage chance synergizes with attack speed and critical hit multipliers.
Twin Strikes Unique Effect Explained
Twin Strikes features a unique effect that drastically boosts burst damage:
·Effect: After casting Double Swing four times, each subsequent Double Swing hits two additional times, dealing 140% increased damage for 3 seconds.
Practical Implications:
·Every four casts of Double Swing triggers a high-damage window
·Bonus hits allow quick elimination of elites or stagger bosses
·Perfect for high-speed melee builds that maintain Fury uptime
If your Barbarian emphasizes speed, mobility, and constant close-range pressure, Twin Strikes elevates both AoE and single-target performance.
How to Get Twin Strikes in Diablo 4
Twin Strikes is an ancestral unique, meaning it only drops at World Tier 4 (Torment) or higher. While multiple sources can yield it, some methods are far more efficient than others.
1. Farm Endgame Boss Hordes (Highest Drop Rate)
Boss hordes provide the most consistent chance for uniques. Summoning these bosses requires specific Diablo 4 materials, but they remain the fastest method for targeting Twin Strikes.
Bosses That Drop Twin Strikes:
·Grigoire, the Galvanic Saint – Hall of the Penitent (Dry Steppes), Torment+, 12x Living Steel
·Harbinger of Hatred – Harbinger’s Den (Lingering Hatred, Nahantu), Torment+, 3x Abhorrent Hearts
Players can also choose to buy Diablo IV Items to speed up summoning materials, improving farming efficiency for this specific unique.
2. Random World Drops
Twin Strikes can appear as random world drops:
·Standard enemies
·Elite monsters
·Chests
The drop chance increases at higher World Tiers, making Torment+ zones the best for spontaneous loot.
3. Nightmare Dungeons
Nightmare Dungeons are another reliable farm method due to:
·Dense elite packs
·Frequent loot explosions
·Guaranteed Rare and Legendary rewards
·End-of-dungeon bonus loot
Prioritize dungeons with melee-heavy enemies for better Barbarian gear alignment.
4. Gathering Legion Events
These timed events spawn large numbers of elite enemies quickly. For rapid loot accumulation, Legion events are excellent, especially when focusing on glove drops.
5. Helltide Events (Top World Farming Method)
Helltides provide the most consistent glove-focused drops:
·Tortured Gift of Gloves chests
·Elite ambushes
·High-density mob clusters
Targeted Helltide farming ensures maximum efficiency without excessive grinding.
6. Gamble Gloves Using Obols
If you have a surplus of Obols, you can gamble for gloves at the Purveyor of Curiosities. This method is highly RNG-dependent and less reliable than bosses or Helltides, but it can yield Twin Strikes occasionally.
Final Tips for Efficient Farming
1. Prioritize Torment+ World Tier to maximize drop chances
2. Focus on boss horde summoning materials for repeatable farming
3. Include Helltides and Nightmare Dungeons in your rotation for loot density
4. Consider buying Diablo IV Items to save time on summoning or gear preparation
5. Use DPS-friendly builds to shorten farming time per event
Conclusion
The Twin Strikes glove is one of the most potent unique items for Barbarian builds centered on Double Swing. Its combination of attack speed, extra hits, and Strength scaling transforms standard rotations into high-burst AoE sequences.
Efficient farming strategies include endgame boss hordes, Helltides, Nightmare Dungeons, and optional gambling via Obols. By targeting these sources in World Tier 4 or higher, players can consistently obtain Twin Strikes and maximize their Barbarian’s combat effectiveness in Diablo 4 Season 11.